USING EMAIL
Q Receiving Email
Select the "Email" Icon and click on your "Inbox"

Click on the email you want to view and the content is displayed under the reading pane. (New or unread emails will be highlighted in BOLD)

Q Sending a new email
Select the "Email" Icon and click on your "Inbox"

Click "New-Email"

Enter the recipiant (you can access your contacts by clicking on "To"), a subject and some content in the email body.

Click "Send"

If you select the "Sent Objects" folder you can view all "Sent Mail"

Q Reply to an email
Select the "Email" Icon and click on your "Inbox"

Select the email you want to reply to and click "Reply"

Enter content for your reply and click "Send"

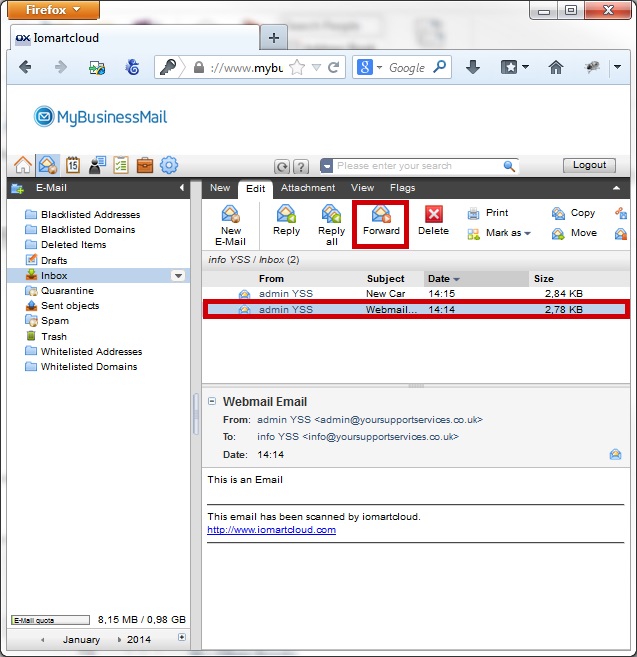
Q Forward an email to another recipient
Select the "Email" Icon and click on your "Inbox"

Select the email you want to forward to and click "Forward"

Enter a recipient for the forwarded email and content for your reply and click "Send"

Q Delete an email
Select the "Email" Icon and click on your "Inbox"

Select the email you wish to delete and click "Delete"

Select the "Trash" folder to view "Deleted Emails"
Emails in your Trash Folder count towards your Quota

To completely remove emails from the server, select the mail you wish to delete from the "Trash" folder and click "Delete"
Emails deleted from the Trash Folder can not be restored

Click "YES" to confirm you wish to delete the email from the server

Q Add a Folder
Select the "Email" Icon and click on your "Inbox"

Click the "Add Folder" Button, and select "Email"

Name your folder and press "Enter" on your keyboard

Q Move an email to a folder
Select the "Email" Icon and click on your "Inbox"

Highlight the email you want to move and click "Move"

Select the folder you want to move the email to

The email should now be in your selected folder

Q Create an email rule
Select the "Configuration" Icon, Select the email Folder and "Filter"

Click "New"

Set the criteria for your email rule and click "Save"

If the rule is possible you will a confirmation alert will be displayed

Q Create a Vacation Notice
Select the "Configuration" Icon, Select the email Folder and "Vacation Notice"

Enter a Subject, content for your vacation notice, whether you want to activate it or not, the number of days between vacation notices to the same sender and check any aliases you want to enable the vacation notice for

Click "Save"

If your changes have been accepted a confirmation alert will be displayed

Q View Email Quota
Select the "Email" Icon

Your Quota is displayed bottom Left

