
SSL
The following guide is aimed at customer who purchased an SSL package and either have their website hosted with an external hosting provider or who have their own dedicated or virtual server. If you use one of our shared web hosting packages, please contact our support team who will order and install the SSL certificate for you !
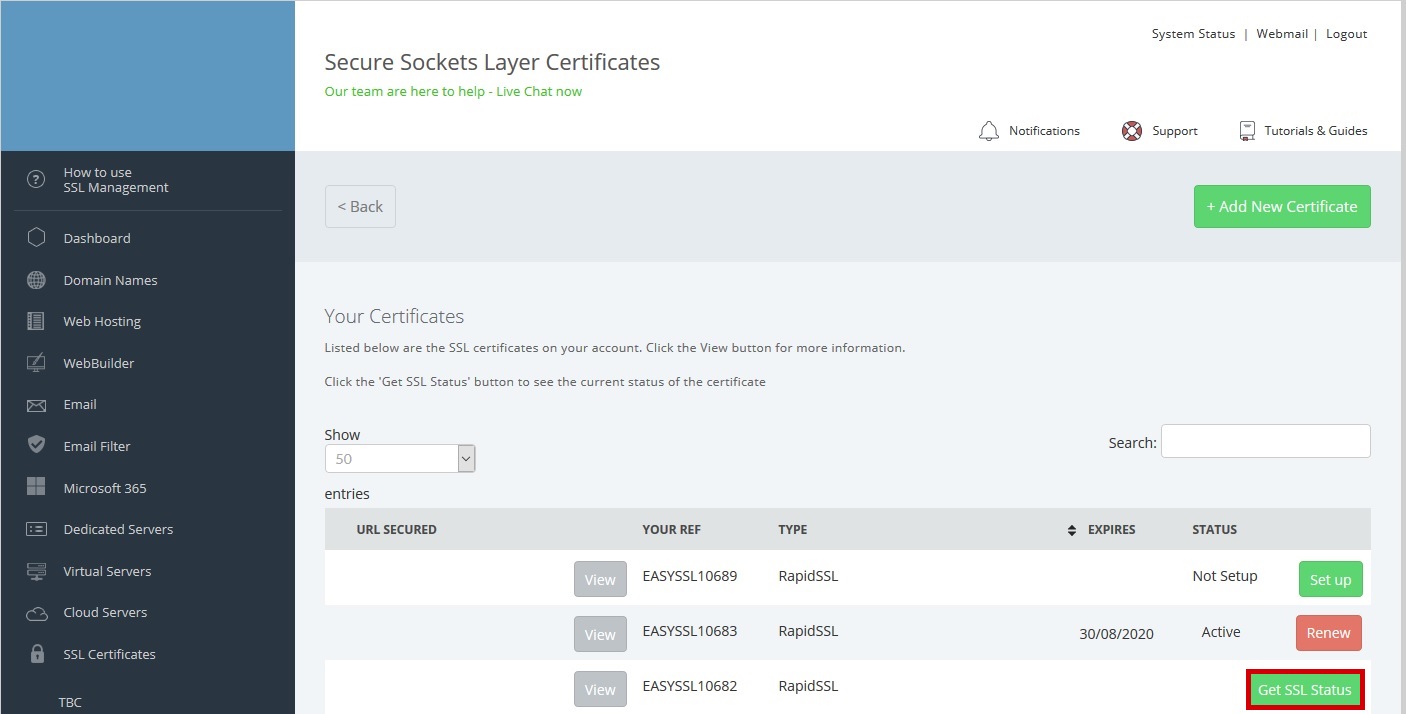
To access your SSL management area, select SSL certificate from the left side menu of your control panel.

To setup or renew your SSL Certificate click "GET SSL STATUS" beside the relevant package. You can then set up a new certificate or renew an existing one as appropriate.
Here you will be able to read about the verification methods available for you to validate the SSL certificate.
Ensure you read all the content at the top of the page so you are aware of what is required before proceeding with the validation type you wish to use!

Generate a Certificate Signing Request (CSR)
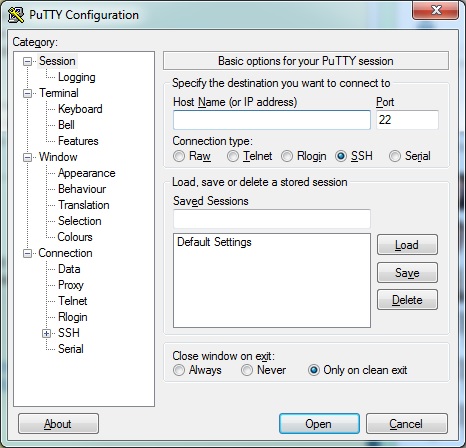
Launch Putty and connect to your server via SSH
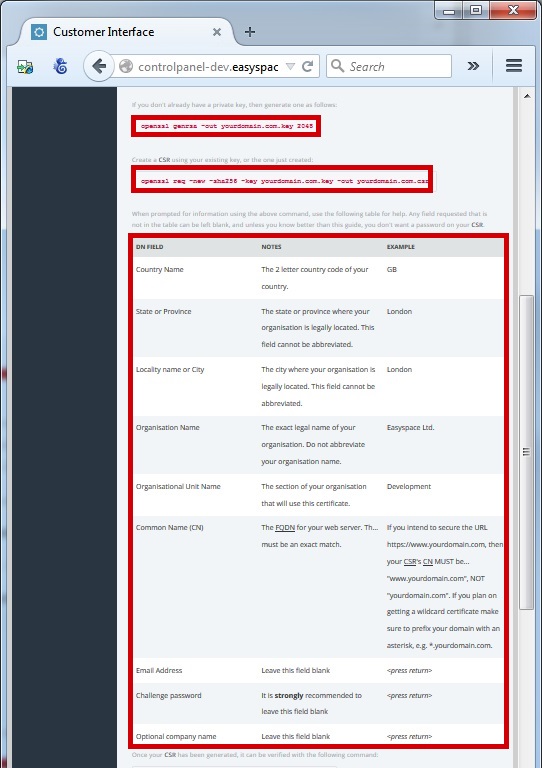
Run the commands listed in the control panel and enter the information required which you can access from the table
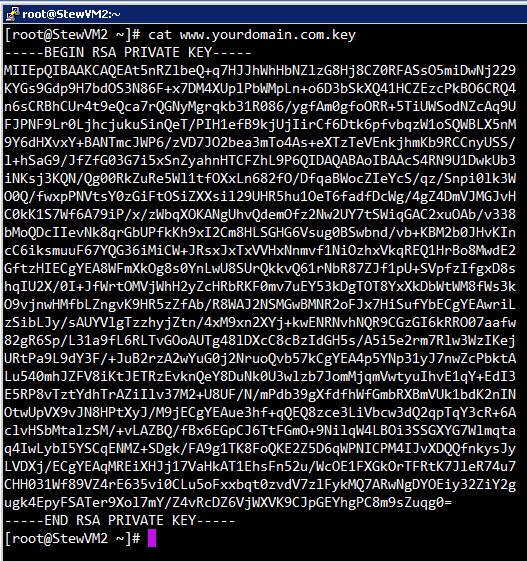
The output in Putty should be as follows

After inputting the data and executing the commands from (5) above the output will be a Private Key and a CSR

You can verify the CSR by running the command listed in the control panel
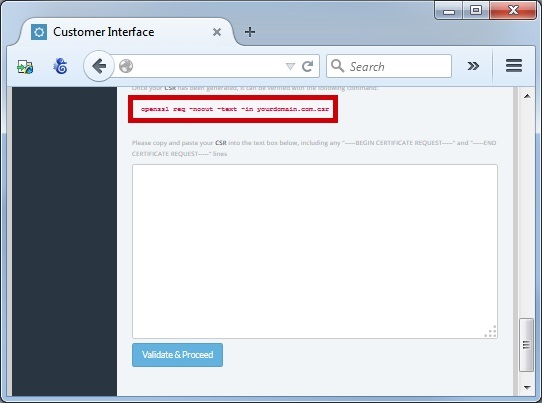
The output in Putty should be as follows,
PLEASE NOTE - The section highlighted should match the information entered for the CSR generation

Copy the CSR generated in step (6) above and paste it into the CSR box and click "Validate & Proceed"
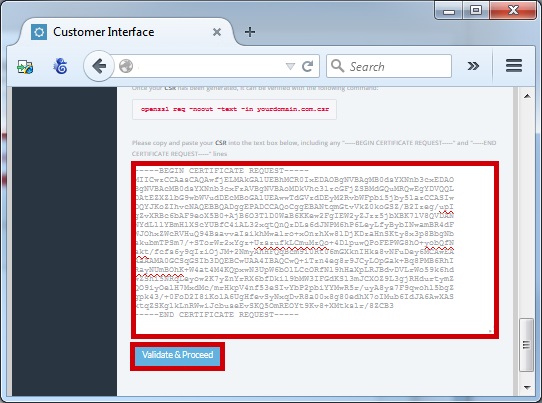
Once You have your CSR generated, copy and paste into the CSR box and click "Validate & Proceed"

On the next page, confirm the CSR information is correct and that the SSL is being ordered for the correct domain.

Further down the page, enter your information for the SSL order.
If you have a UK address, please use GB as the country code.

The next step you will choose your preferred validation method.

Validate by Email
Select from the drop down of approved email addresses where the validation email will be sent to and Submit SSL.

You will receive an email with details of your SSL order. Check that the domain and all information looks correct, then click on the link to approve the certificate.

Once you've verified the link, the certificate will be sent out to you within the next 24-48 hours.
Validate by File
You will be presented with the information below to add a file to your web space of your hosting provider or server.

The file location requires you to create two folders and a file. Create the .well-known folder first and enter the folder. Within here create another folder called pki-validation. Finally, create an empty txt file and name it filauth.txt.
Please note that the first folder .well-known requires the dot at the beginning of the folder name which effectively hides the folder. You may need to turn on hidden folders and file depending on your FTP client settings

Open fileauth.txt for editing and enter the information from the FILE CONTENTS section and save.

Once you've added the fileauth.txt to your website inside the correct folders, go back to your control panel and Submit SSL.

Once added, it can take a few hours for the certificate to verify and should be sent out to you within the next 24-48 hours.
Validate by DNS
When you select Validate By DNS, you will be presented with the DNS record to add with your DNS provider.
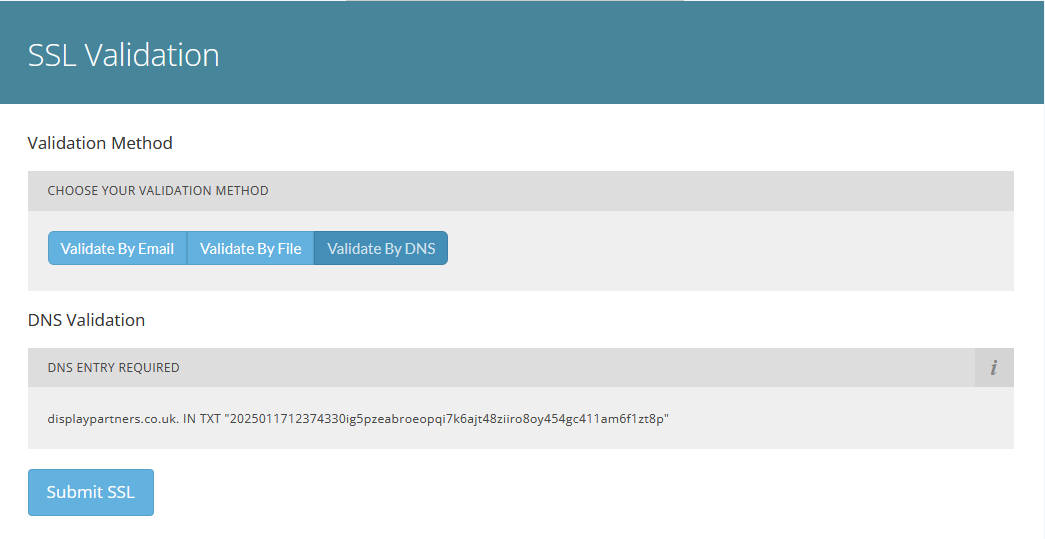
If you are using our nameservers (ns1.namecity.com and ns2.namecity.com) you will have the option for us to make the changes automatically for you. Tick the option under Automatically Create This DNS Entry
Once added, depending on DNS propagation time, your certificate should be sent out to you within 24-48 hours.
You will be presented with a success message
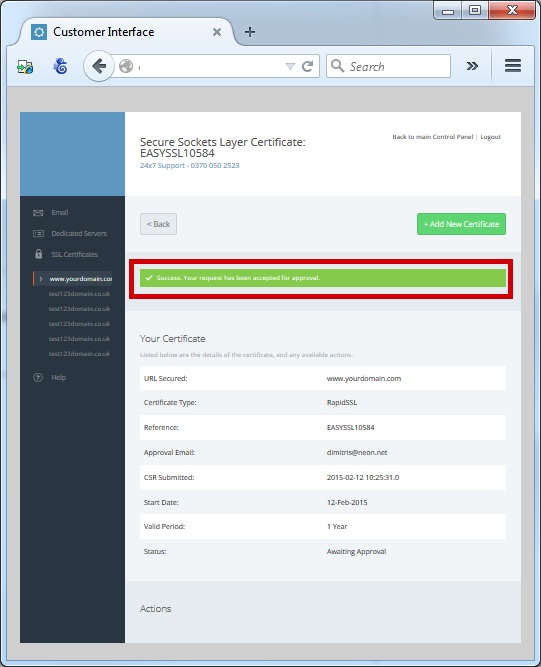
The Status of your SSL Certificate in the Control panel will change to "Current"

View Certificate
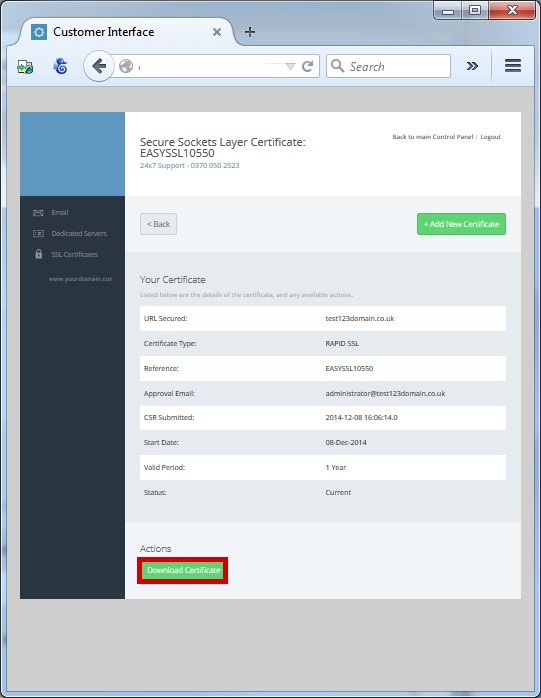
You can view your certificate by clicking on "View"

Information on your certificate is provided on this screen, and you can download your certificate by clicking "Download Certificate"
Your certificates are displayed on screen for you to apply to your server
