CONVERT POP TO IMAP IN WINDOWS LIVE MAIL
Helpful Hint!
Before you start you will need to have the password for your mail box which can be reset via your control panel if you do not know it! We keep your passwords encrypted for safety.A Creating a Backup (Optional)
To ensure no important email is lost you may wish to
create a backup.
NOTE : The steps below will only back up email on
Windows Live Mail. Any email which has been
downloaded on another client or device will need backed
up separately.
Start Windows Live Mail and select Windows Live Mail >> Export Emails >> Email Messages

Select Microsoft Windows Live Mail and click Next

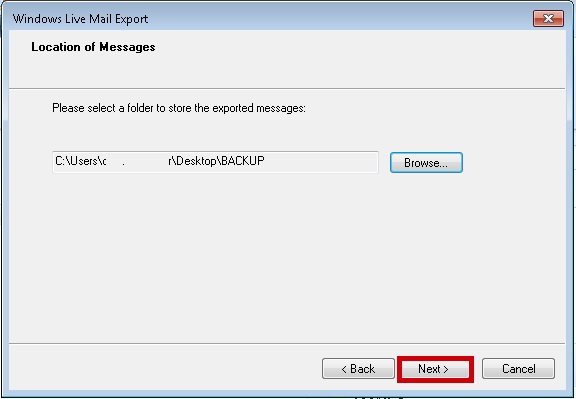
Select Browse

Select Desktop then Make New Folder

Rename the folder to BACKUP and click OK

Click Next
Click Selected Folders, Navigate to your inbox and click Next

Mail will backup, when complete click Finish

B Removing Your POP Account
Before you can configure Windows Live Mail to
IMAP you will need to remove your POP email account
NOTE : If you have not carried out steps 1-8 in section
A, all contents of the mail box will be deleted!
Select the Windows Live Mail>>Options>>Email Accounts.

Select the account you wish to remove and click Remove

Confirm you wish to remove the account by clicking OK

Click the Close Button

C Adding Your IMAP Account
Use this section to add your IMAP email account.
Open Windows Live mail and select the Accounts tab at the top and then press the Email button:

Complete the details on the wizard that loads up, ensuring the Manually configure server settings for e-mail account option is selected. When done, press Next

Complete the server Settings and click Next then Finish
Incoming Server Information |
|
|---|---|
| Server Type : | imap |
| Server Address : | imap.iomartmail.com |
| Port : | 143 |
| Logon Username : | Your email address or the username configured in your CP. |
Outgoing Server Information |
|
|---|---|
| Server Type : | smtp.iomartmail.com (ensure my outgoing server requires authentication is ticked) |
| Port : | 587 |

At this point, you will be able to receive emails, but not send. To change this, right click on your new email account and select Properties

On the Your Account Properties screen, select the Servers tab. Ensure the My server requires authentication option is selected and then click the Settings button

On the Outgoing Mail Server settings screen, select Log on using and then enter your email details, then click OK

Click the OK on all screens to go back to the main Mail Screen
Still having trouble sending mail? You may need to change your SMTP Port - info on how to do this can be found Here
D Restoring Mail From Backup to Your Inbox
Once your email box is configured in Windows Live Mail you can restore your backup to your inbox so your IMAP email is accessible on any client or device
Select Windows Live Mail >> Import Messages

Select Windows Live Mail and click Next

Select Browse

Navigate to BACKUP and click OK

Click Next

Click Selected Folders, Navigate to your inbox and click Next

Your mail will import, when complete click Finish

A new Sub folder called Storage Folders will display, expand this until you can see your imported mail, Select the email you wish to put into your IMAP Folder
- You can select all emails by holding CTRL on your keyboard and pressing the A button
- You can select individual emails by holding the CTRL button and clicking the selected emails with your mouse

Click on the Folders tab and then Move to

Navigate to your new IMAP Inbox and click OK

Navigate to your new IMAP Inbox to ensure the mail is accessible
